Materials Needed Gather these supplies before you begin:
- A cherished garment to repurpose
- Fusible fleece interfacing to act as a fabric stabiliser
- Polyester stuffing or polyfill
- A sturdy button to attach the head
- Embroidery floss for the smile
- Heavy duty sewing thread
- Plastic craft eyes and a nose
- Sewing machine, iron, and fabric scissors
Sewing Instructions
1. Prepare the Fabric
- Carefully dismantle the garment to salvage as much material as possible.
- Cut off the sleeves first, then cut down one side of the main body to open up a large workable piece.
- Cut pieces of your fusible fleece interfacing and iron them onto the back of the fabric. This acts as a magical stabiliser that makes stretchy fabric much easier to sew.
- For the back of the bear, iron the interfacing onto the sleeve pieces, stopping just before the seam line to preserve the nice finished edges.
2. Craft the Bear Body
- Stitch the two sleeve pieces together to form the back of the body. Leave a small gap so you can easily turn the fabric right side out later.
- For the front piece, find the logo or text you want to highlight and centre the pattern directly over it.
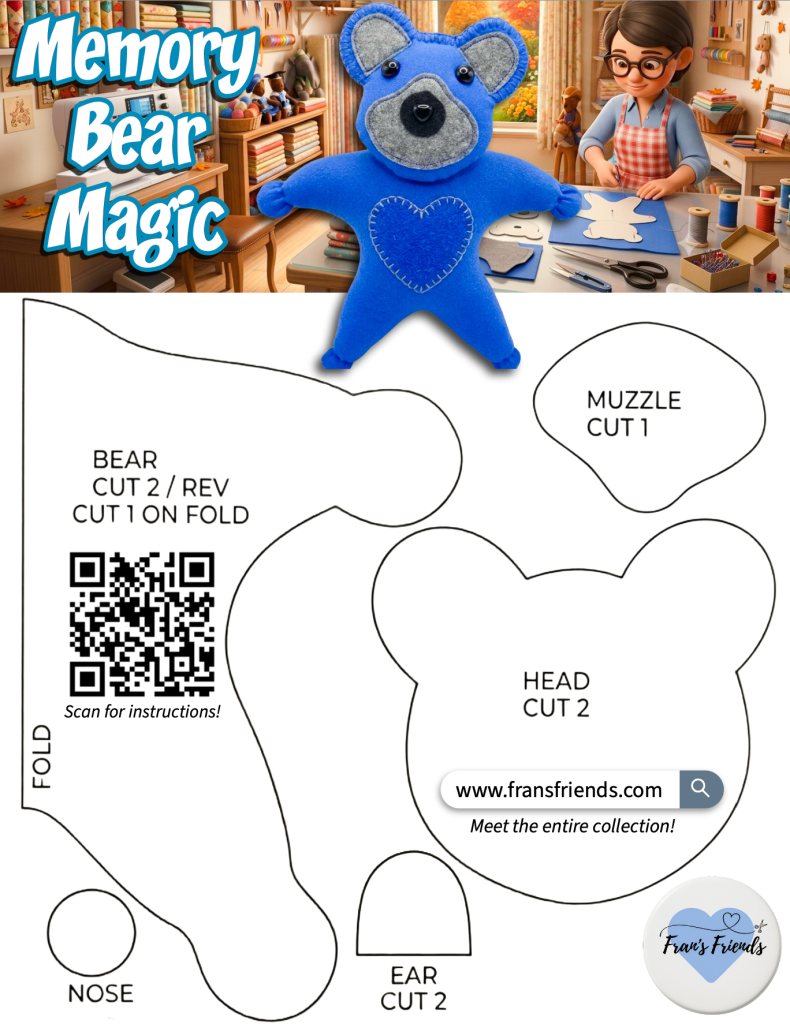
- Trace the bear shape from pattern_letter_size_cropped-7.pdf onto the stabilised fabric.
- Sew directly along your traced lines, then carefully trim away the excess fabric leaving a small seam allowance.
- Turn the body right side out through the gap you left earlier.
3. Create the Head
- Cut out a front and back piece for the head using your pattern.
- Apply the ears, muzzle, and plastic eyes using your heat and bond fabric webbing.
- Stitch around the bottom edge of the head, leaving the top and the ears open.
- Turn the head right side out and gently fill it with your polyester stuffing.
- Finish the head by blanket stitching around the ears and across the open top.
- Use your embroidery floss to stitch a simple, sweet smile.
4. Final Assembly
- Fill the completed body with your polyester stuffing until it is nice and squishy.
- Thread a needle with heavy duty thread and stitch around the arms and legs to pull them in and give the bear some definition.
- Finally, secure the head to the body using your sturdy button.
A Crafting Note: Remember the golden rule to measure twice and cut once. Most importantly, keep in mind that these bears feature small parts like buttons and plastic noses. They are designed as treasured keepsakes rather than toys, so they are not suitable for young children.