Hey everyone! I am so excited to kick off a brand-new project series. This year, I’ve decided to keep the Christmas spirit alive all year round by creating handmade table decor, one month at a time. By the time December rolls around, I’ll have a beautifully coordinated table set and ready for the holidays!
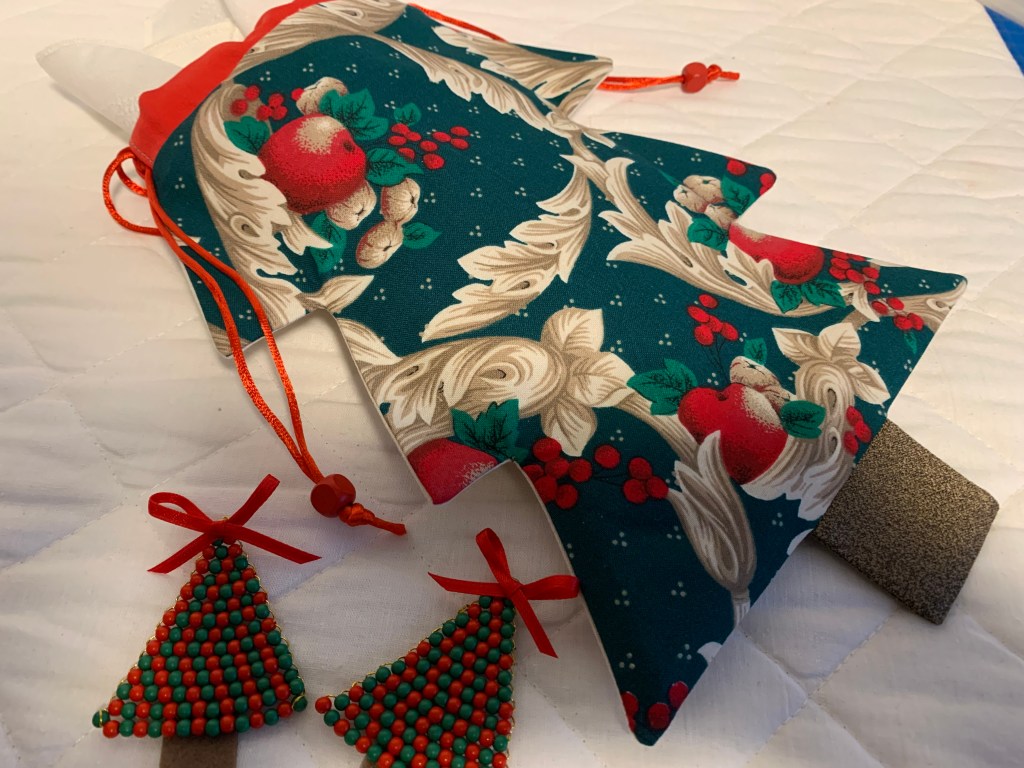
For my very first project of the year, I decided to tackle something both adorable and functional: Christmas Tree Bag Napkin Holders. These little bags are perfect for tucking in your napkins and adding a whimsical, festive touch to each place setting. Plus, it was the perfect excuse to upcycle an old Christmas tablecloth I’ve been holding onto for nearly 30 years!
The Vision: Upcycling with a Purpose
I had this massive, beautiful Christmas tablecloth that just wasn’t getting used anymore since I don’t host giant dinners like I used to. Instead of letting it sit in a drawer, I decided to use it as my primary material for this year’s decor.
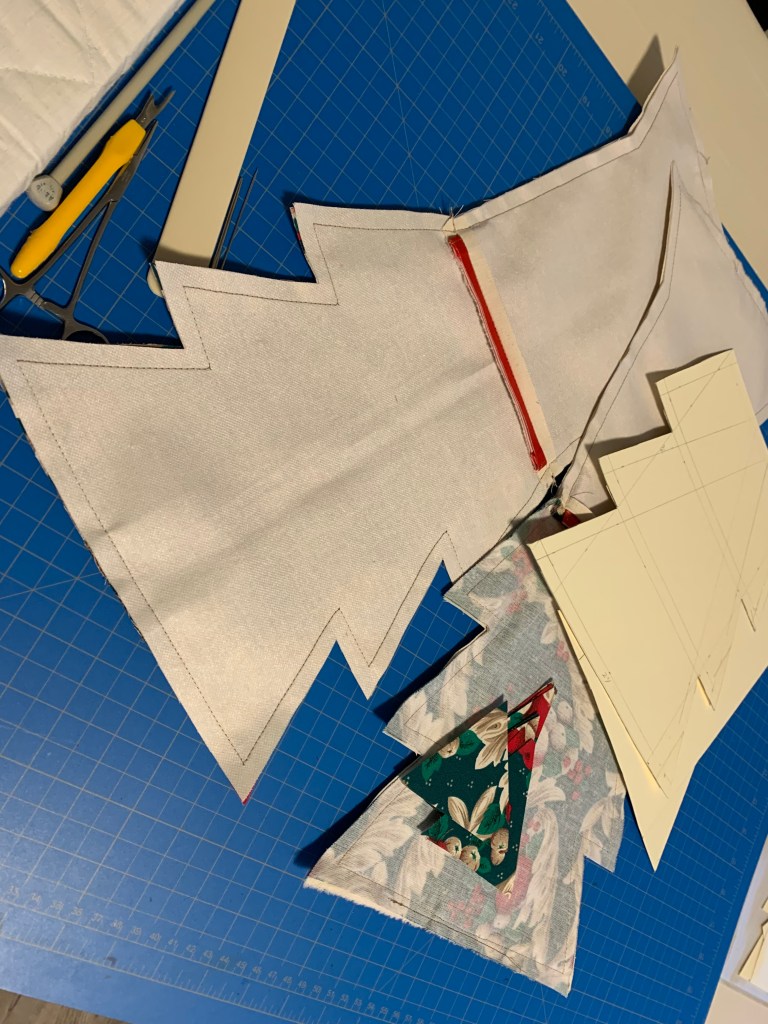
To save on the “good” fabric, I used the patterned tablecloth for the front and a sturdy canvas for the back. It adds a nice weight to the bags and makes my vintage fabric stretch further!
What You’ll Need
If you want to follow along and make your own, here’s what I used:
- Christmas Fabric: (An old tablecloth, scraps, or new festive prints).
- Backing & Lining Fabric: I used canvas for the back and a simple lining for the inside.
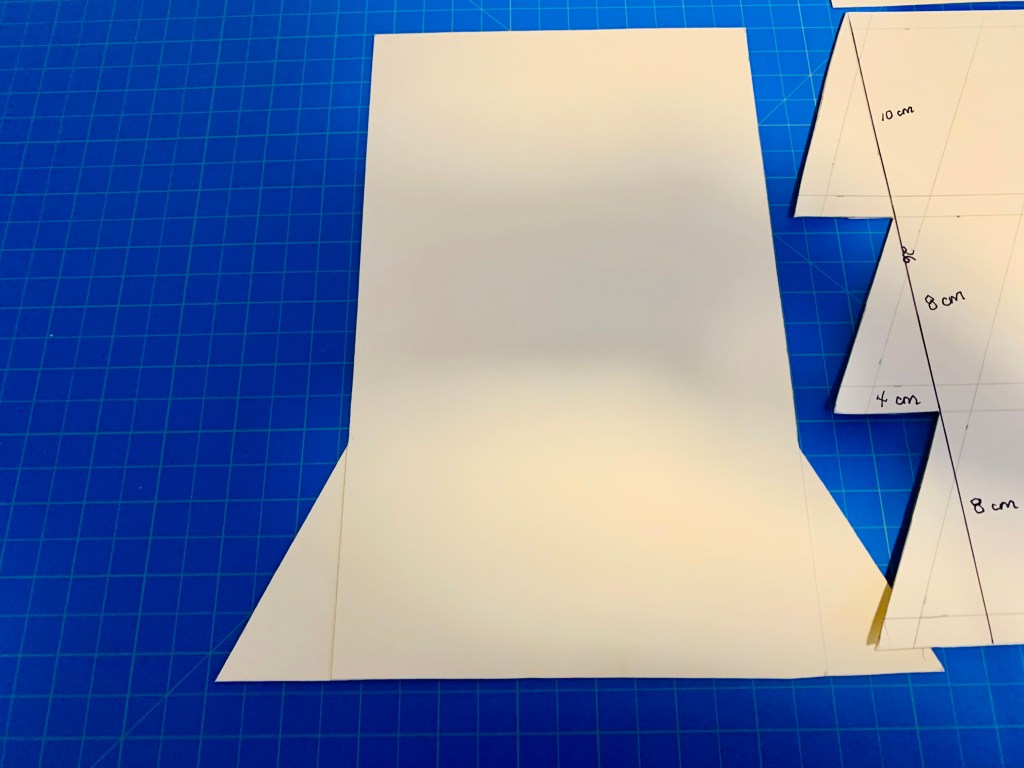
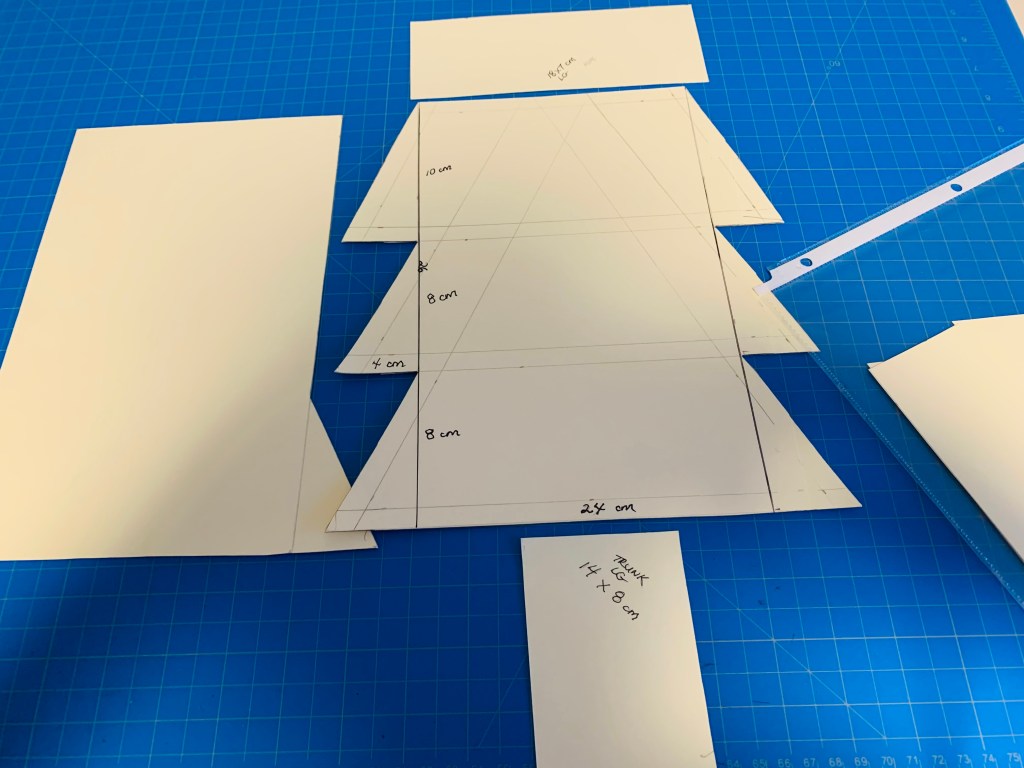
- Cardstock: For creating your reusable templates.
- Drawstring Cording: I used a sleek satin cord.
- Decorative Beads: Wooden or festive beads to finish the ends of the cord.
- Sewing Essentials: Sewing machine, iron, scissors, a knitting needle (for turning corners), and pins.
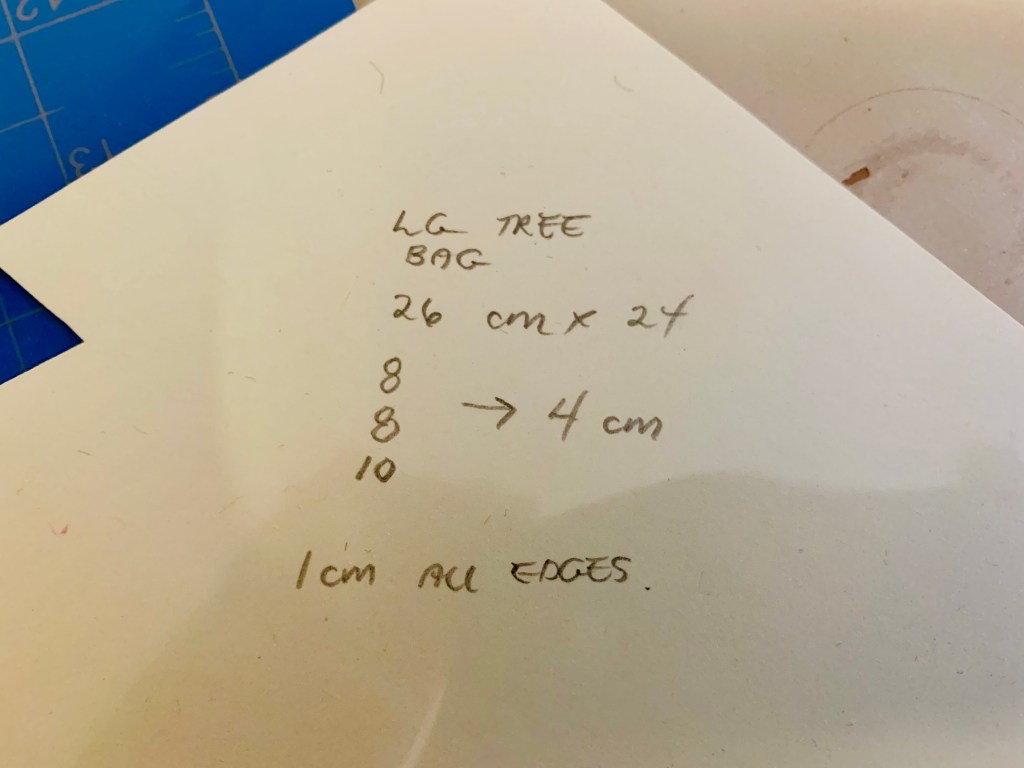
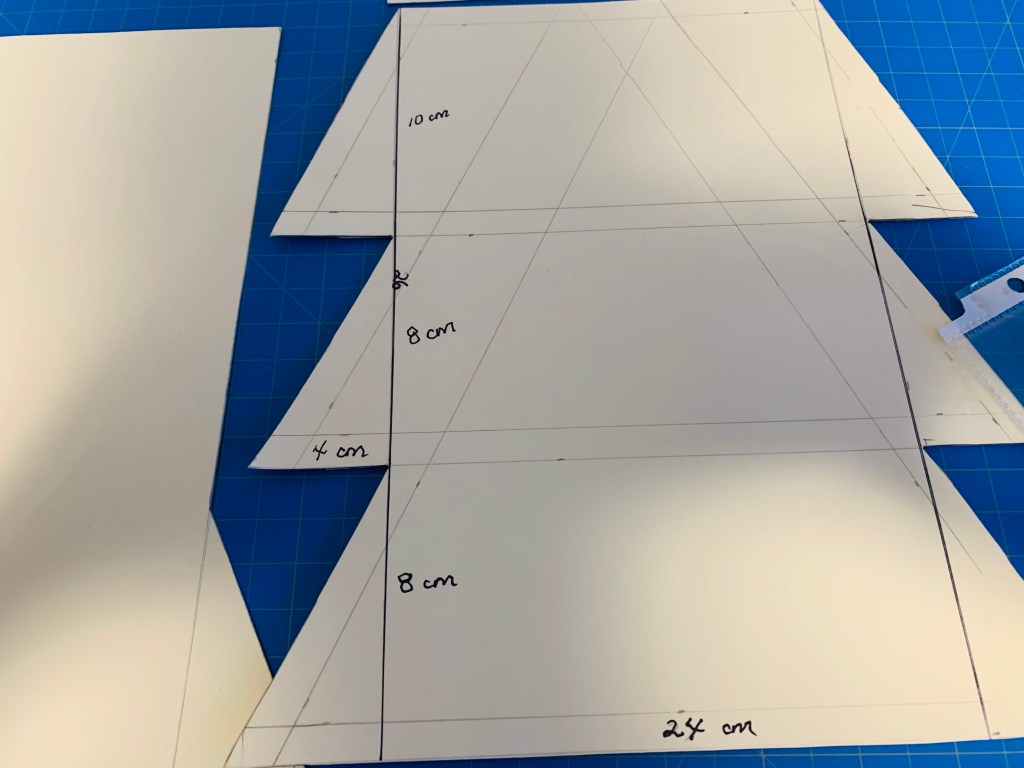
The “Magic” Dimensions
I spent some time researching patterns on the internet and settled on these dimensions for a perfectly sized napkin holder:
- Baseline: 24 cm across.
- Total Height: 26 cm from base to top.
- Branch Levels: I marked the points at 8 cm, then another 8 cm, with a 10 cm section at the top to accommodate the casing.
- Branch Depth: Measure 4 cm in from each side to create the “tree” shape.
I highly recommend making a cardstock template first. It makes cutting out multiple bags (I made four!) so much faster and more accurate.
My Top Sewing Tips for Crisp Trees
The sewing itself is quite simple, but the secret to a professional look is all in the preparation and the finishing. Here is what I learned during the process:
- Precision Points: When sewing the points of the tree branches, you want them to look sharp. To achieve this, cut the fabric edge very close to your stitching line at the points (being careful not to cut the thread!).
- Clip Your Curves: For the inside corners where the branches meet, clip the fabric right up to the seam. This allows the fabric to lay flat when you turn it right-side out.
- The “Turning” Secret: After turning the bag right-side out, use a knitting needle or a sharp pin to gently pull those corners out. Don’t force it, or you might poke a hole!
- The Power of the Iron: This is the most important step! I spent more time at the ironing board than at the sewing machine. Pressing those seams flat and crisp is what takes this project from “homemade” to “handmade professional.”
Photo Gallery: The Pattern and Process
In this section, you can see how the template looks on cardstock and the difference a good pressing makes on those branch points!
Final Thoughts
I am so pleased with how these turned out. They are simple to make, but the impact they’ll have on my Christmas table is huge. It’s such a satisfying feeling to give new life to an old heirloom tablecloth. Stay tuned for next month’s project as I continue building my dream holiday table!
Watch the full tutorial here: Christmas Dinner Table Series: My Handmade Christmas Tree Bag Napkin Holder


Leave a comment