Gnome Sweet Gnome: A Step-by-Step St. Patrick’s Day Crafting Adventure! (Fran’s Perspective)
Hey everyone! Fran here, and I’m so excited to share my St. Patrick’s Day gnome-making journey with you. Let’s dive right into the crafting magic!
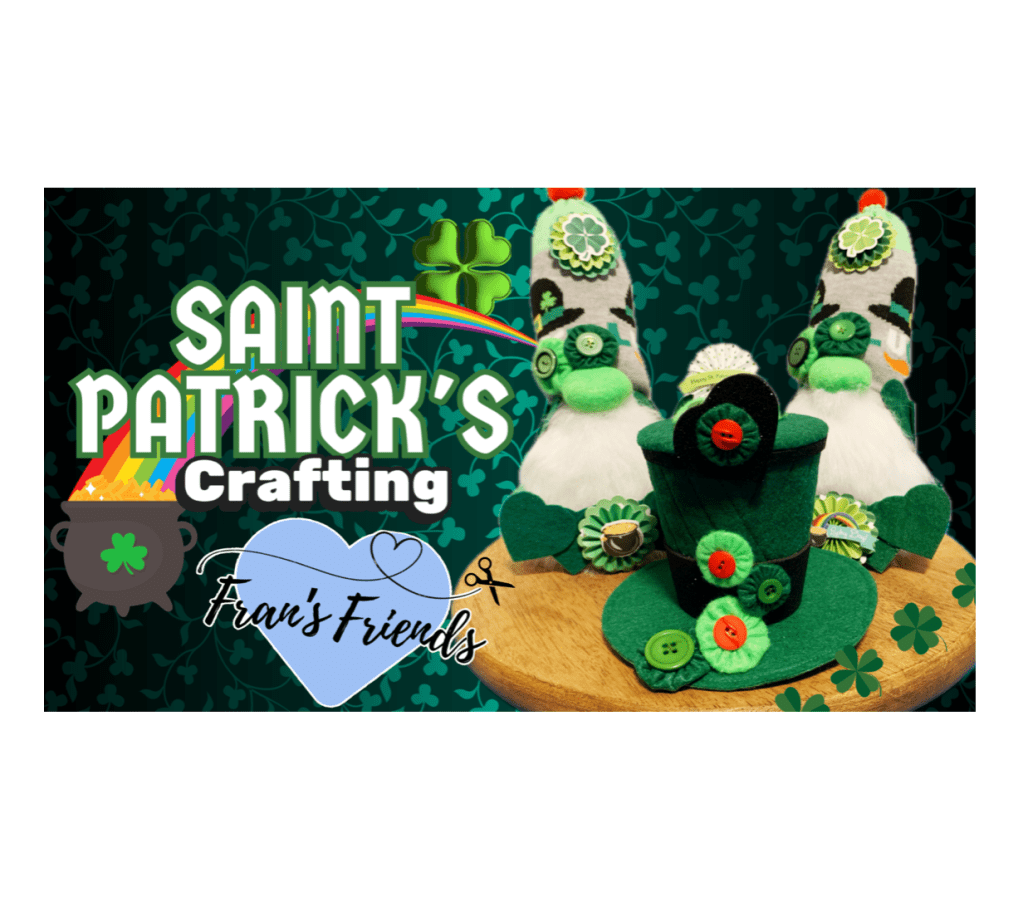
1. Sock It to ‘Em: Creating the Gnome Bodies
First things first, we need the gnome bodies! I found these adorable leprechaun-themed socks, and they were just begging to be turned into something special.
- Choosing the Socks: I opted for socks with festive patterns and colors – think shamrocks, rainbows, and lots of green!
- Stuffing and Shaping: I carefully stuffed the socks with poly-fil, creating a nice, plump base for the gnomes. I made sure to pack it tightly to give them a sturdy shape.
- Securing the Top: I then gathered the top of the sock and secured it with a rubber band or some twine, creating the gnome’s head.
2. Felt-tastic Fun: Crafting the Hats and Beards
Now, for the felt! This is where the gnomes really start to take shape.
- Hat Making: I cut out cone shapes from felt and sewed or glued them together to create the gnome hats. I experimented with different colors and sizes to add variety.
- Beard Magic: For the beards, I cut out a larger, rounded piece of felt and then snipped along the edges to create a fringe. This gave the beards a nice, fluffy texture. I then attached the beards to the sock bodies, just below the “head” section.
- Felt Yo-Yos: For a playful touch, I made some felt yo-yos. I cut out small circles, gathered them in the center, and secured them with a stitch or glue. These added a delightful, whimsical element.
3. Embellishments Galore: Adding the St. Patrick’s Day Sparkle
This is where we really get to personalize our gnomes!
- Glitter Foam Accents: I used glitter foam to create sparkly shamrocks, stars, or other festive shapes. I attached these to the hats or bodies for a touch of bling.
- Button Bonanza: Buttons are a crafter’s best friend! I added buttons in various sizes and colors to the gnomes, using them as eyes, hat decorations, or even as accents on the beards.
- Bubble Stamp Fun: I used bubble stamps to add fun patterns to the gnomes. This was a great way to add texture and visual interest.
- Adding the Nose: I used a small wooden bead, or a small ball of felt, to make a cute nose for each gnome.
4. Final Touches and Display
- Arranging the Gnomes: I arranged the finished gnomes in a festive display, adding other St. Patrick’s Day decorations like shamrock garlands or gold coins.
- Gifting or Keeping: I decided to keep a few for myself and give the rest as gifts. They’re perfect for spreading a little Irish cheer!
And there you have it! That’s how I created my adorable St. Patrick’s Day gnomes. I hope you’re inspired to try it yourself!


Leave a comment