
To make a 12 Months of Christmas Ornament Advent Calendar, you will need the following materials:
- Christmas fabric with glitter (for the backing)
- Solid white cotton (for the ornament squares)
- Fusible woven cotton interlining
- Fusible fleece
- Optional: Silk fabric for decorative reinforcement
- Optional: Ribbon or satin fabric for framing
- Ornaments: Christmas ornaments (approximately 4 inches in size)
- Other:
- Measuring tape
- Pencil
- Scissors
- Iron
- Sewing machine
- Thread
- Decorative stitch
- Large gold rings
- Glue
- Pom-poms
- Bows
- Bells
- Tissue paper
Once you have gathered all of your materials, you can begin by planning and measuring the size of your ornament squares. The recommended size is 6 inches, but you can adjust this to your liking. Once you have determined the size of your ornament squares, you can add 3 inches to each side of the square to create a 12-inch total square. This will give you plenty of room for wider mitered corners. While the image below shows 30 inches by 24 inches, I decided to use a slightly larger margin
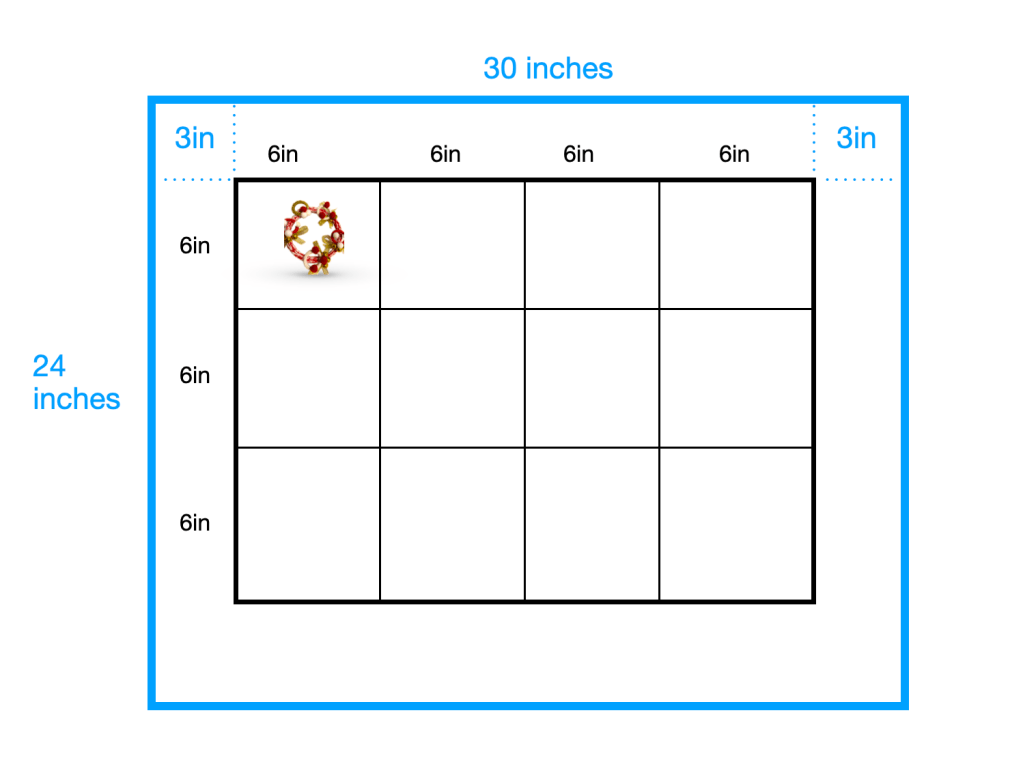
I went with four squares across by three down.
Next, cut the fusible woven cotton interlining and solid white cotton to the desired size. The solid white cotton should be the same size as the interlining.
Once you have cut the fabric, you can fuse the woven cotton interlining to the back of the Christmas fabric. Then, fuse the fleece to the back of the solid white cotton.
Next, assemble the ornament squares by placing the solid white cotton on top of the Christmas fabric, right sides together. Stitch a decorative stitch along the lines of the 6-inch squares to mark them. If desired, you can insert a strip of silk fabric along the bottom edge for reinforcement and stitch it down.
Once you have stitched the ornament squares together, you can stitch around the entire perimeter of the fabric, leaving a small opening for turning. Turn the fabric right side out and press. Then, close the opening with a blanket stitch.
To create the hangers, cover the large gold rings with fabric, similar to making napkin rings. Glue the covered rings to the corners of the calendar. Attach two hearts to the top of the calendar, one on each side of the hangers. I’ve put mine behind my signature hearts.
To make the mitered corners, fold the fabric at the corners to create mitered edges. Stitch the corners in place.
You can add the January ornament once you have made the finished corners. To create the January ornament, you can use a cording machine to make a cording using colourful threads. Then, attach pom-poms, bows, and bells to the cording.
Finally, fold the calendar in thirds for easy storage. Place a piece of tissue paper over each ornament to protect it.
To continue creating your Advent calendar, you can create unique ornaments for each month using various materials and techniques.


Leave a comment